Tire Gard Installation
Tire Gard protects your tire from flats and installation couldn’t be simpler
 Protect your pneumatic tires from the elements with a Tire Gard. The guard fits precisely in between your tire and tube to protect the tube from any sharp objects. You simply install the guard in your tire and get to work.
Gathering Important Information
Every Tire Gard is custom made to fit your specific tire. Because tire sizes vary from manufacturer to manufacturer, we need to know detailed information about your tires in order to build them to fit correctly. Although we do stock the popular.
This includes the:
- Tire Manufacturer
- Tire Size
- Tread Design
Step-by-Step Installation Process
Before you install your Tire Gard, check for any objects or debris inside the tire.

Step 1
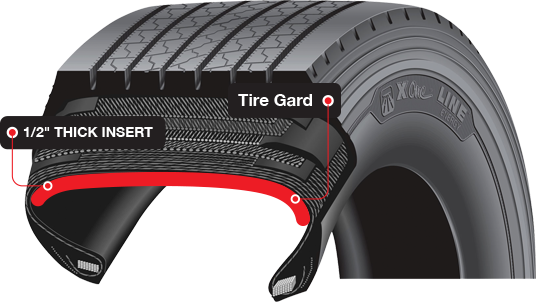
The Tire Gard has a flat side (tube side) and a beveled edge side (tire side). The beveled edge gives a smoother fit in the shoulder area to help prevent tube chafing.
Step 2
The cut away views show the Tire Gard is 1/2″ thick.
Step 3
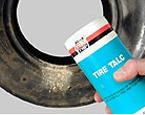
Apply a coat of the tire talc or tire lube to the Tire Gard before installing the guard.
Step 4
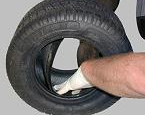
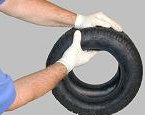
Squeeze the Tire Gard together and insert it in the tire. Push the Tire Gard to the bottom of the tire.
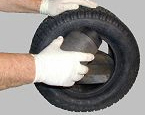
Step 5
Squeeze the remaining Tire Gard together and push it inside the tire.
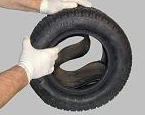
Step 6
With the Tire Gard inside the tire, push the loop end inside the tire beads.
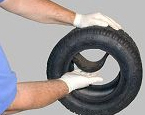
Step 7
With just a large loop left, push on the center of the loop to push remaining Tire Gard in place.
Step 8
If there is a bulge or small loop left after pressing several times in different areas, then work the liner around with hands to eliminate all spaces. If Tire Gard appears to be too small, once tube is inserted and inflated, Tire Gard will expand to fit tire. If the guard does not fit correctly, it will cause a tube failure.
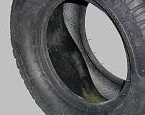
Step 9
When the Tire Gard fits correctly inside the tire, the Tire Gard will lay flat all the way around the inside of the tire. The fit should be snug, yet there should be no bulges or loops in the Tire Gard.
Downtime is expensive
Want to know how much you could save with a Tire Gard? Add up your total savings with our Downtime Calculator!